After customers book you online or accept a proposal, they're automatically prompted to set up their account. This requires no action on your part and gives the customer access to their full customer portal.
In rare cases you may decide to manually create a confirmed booking. When this happens, you'll need to manually send them an invitation to finish setting up their account. There are a few ways you can do this:
When manually creating a booking
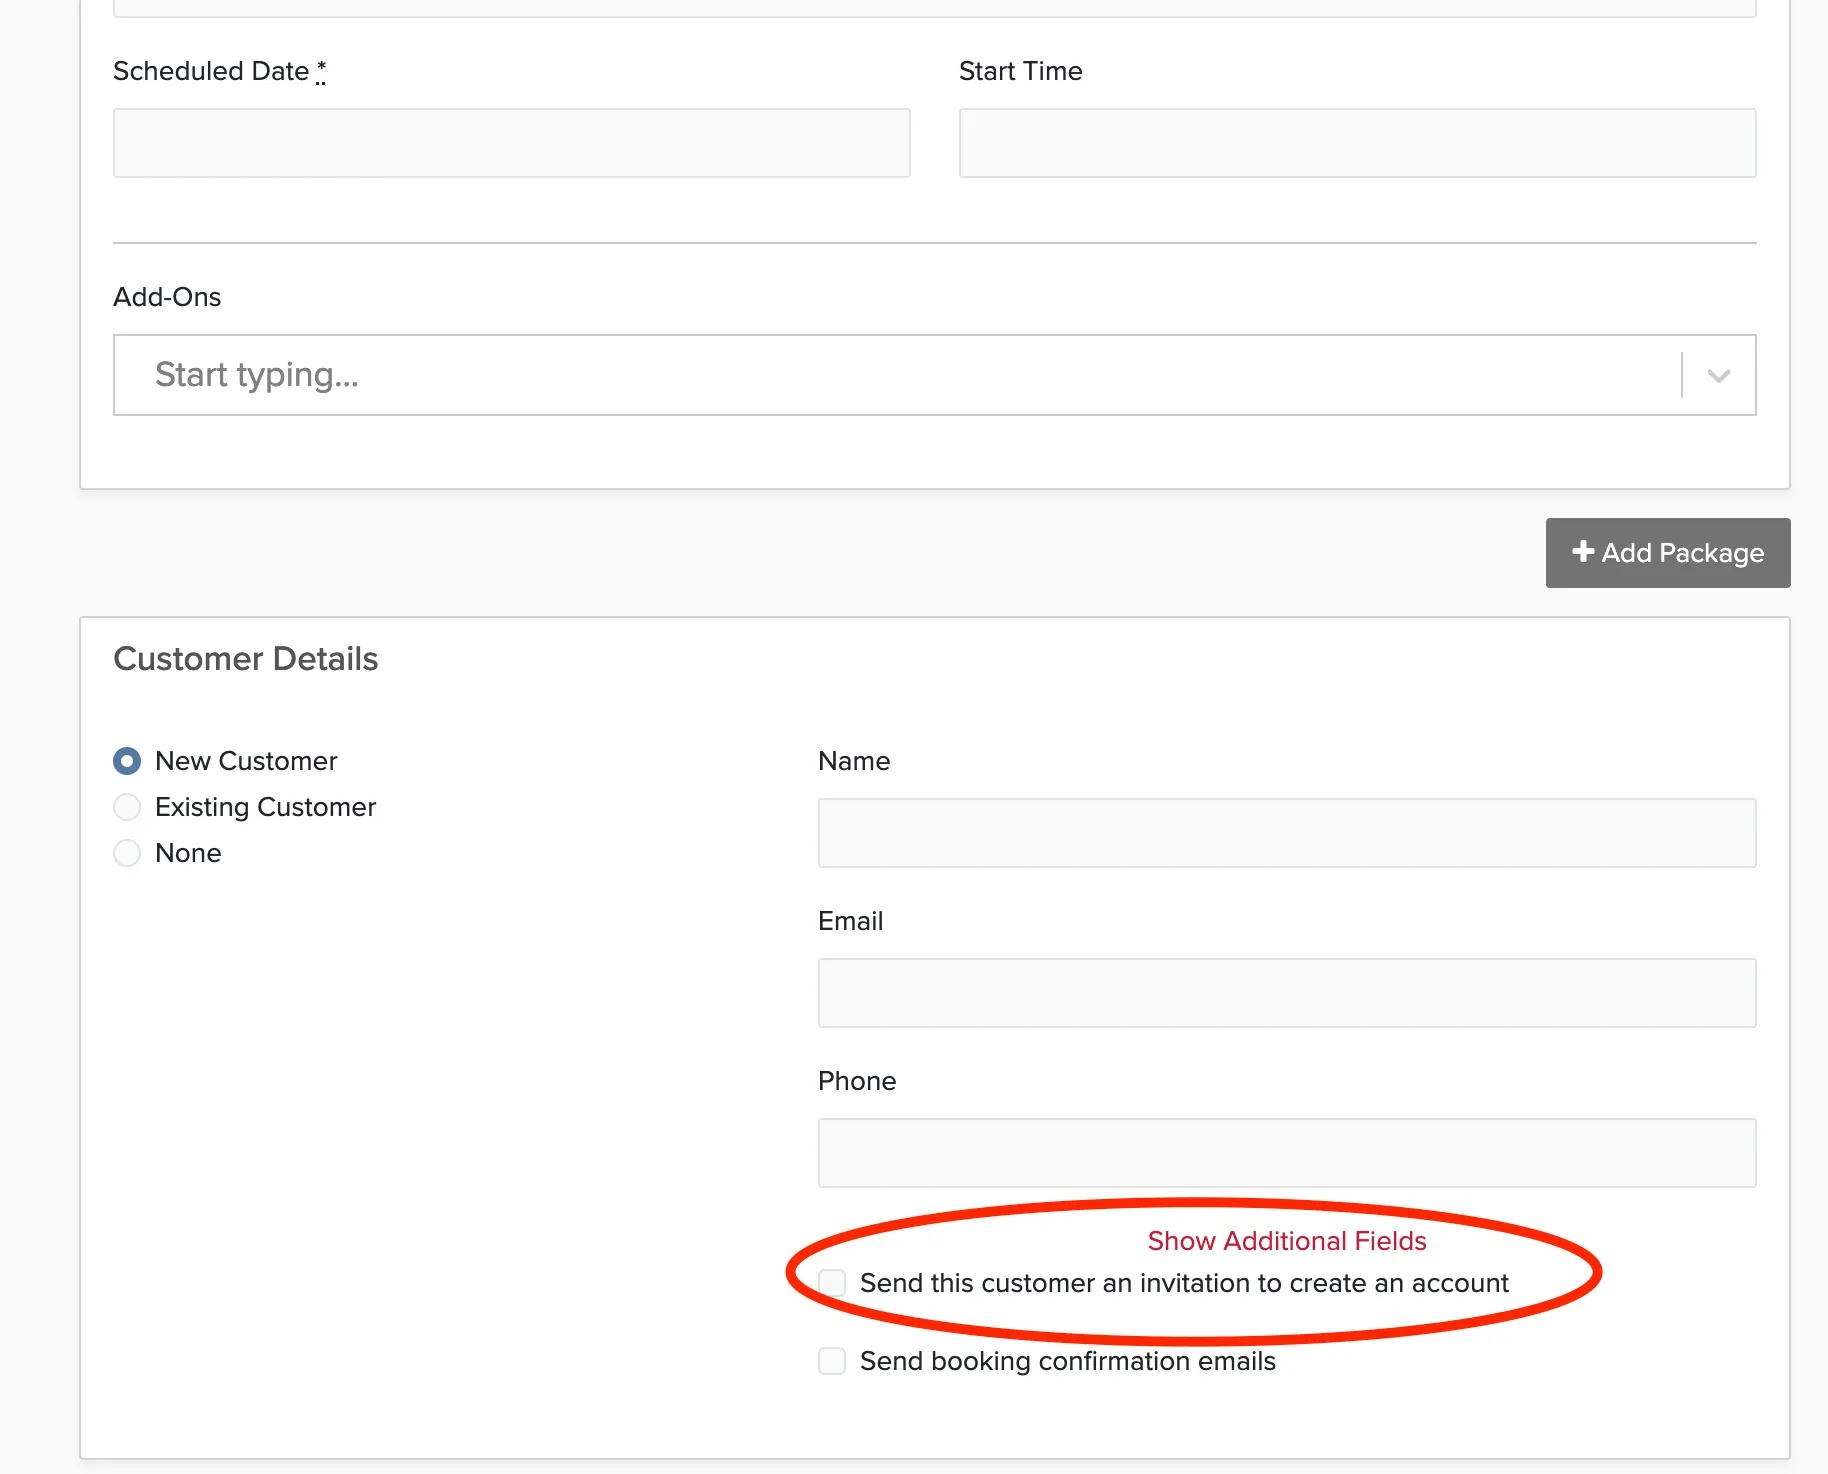
When you click Create New > Log Booking (Confirmed), choose the checkbox labelled Send this customer an invitation to create an account.
When adding a new client to an existing booking
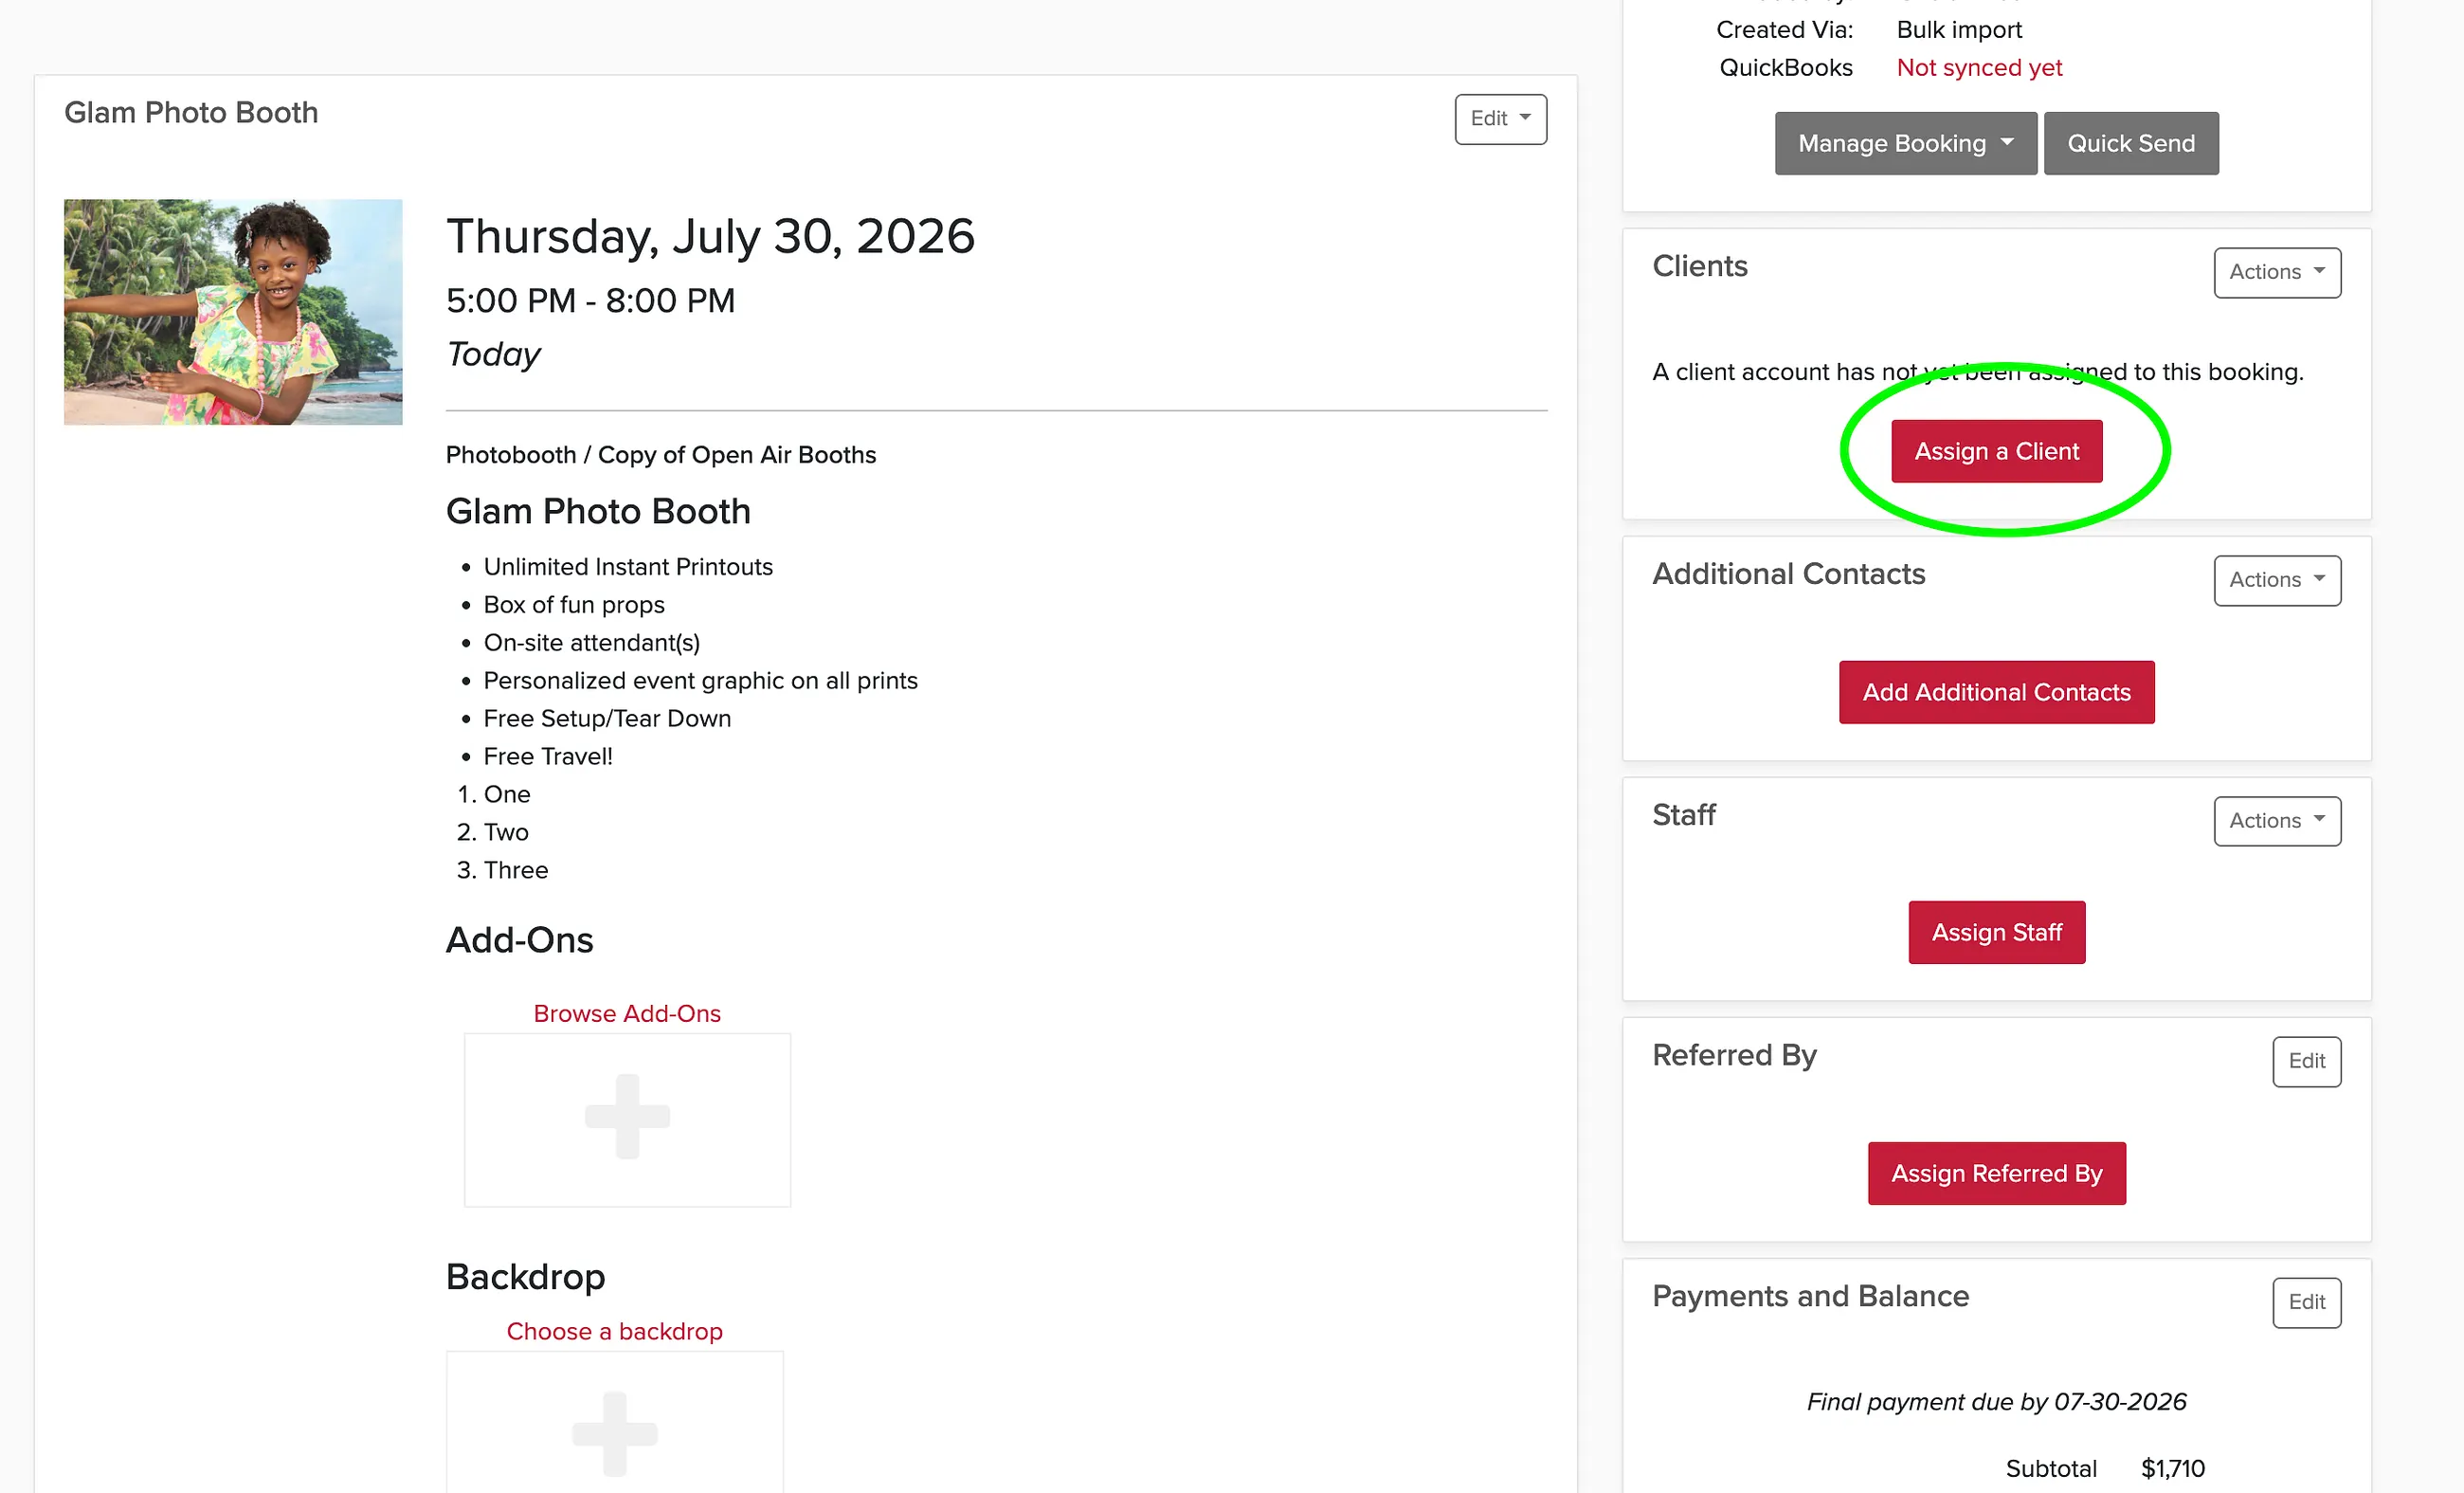
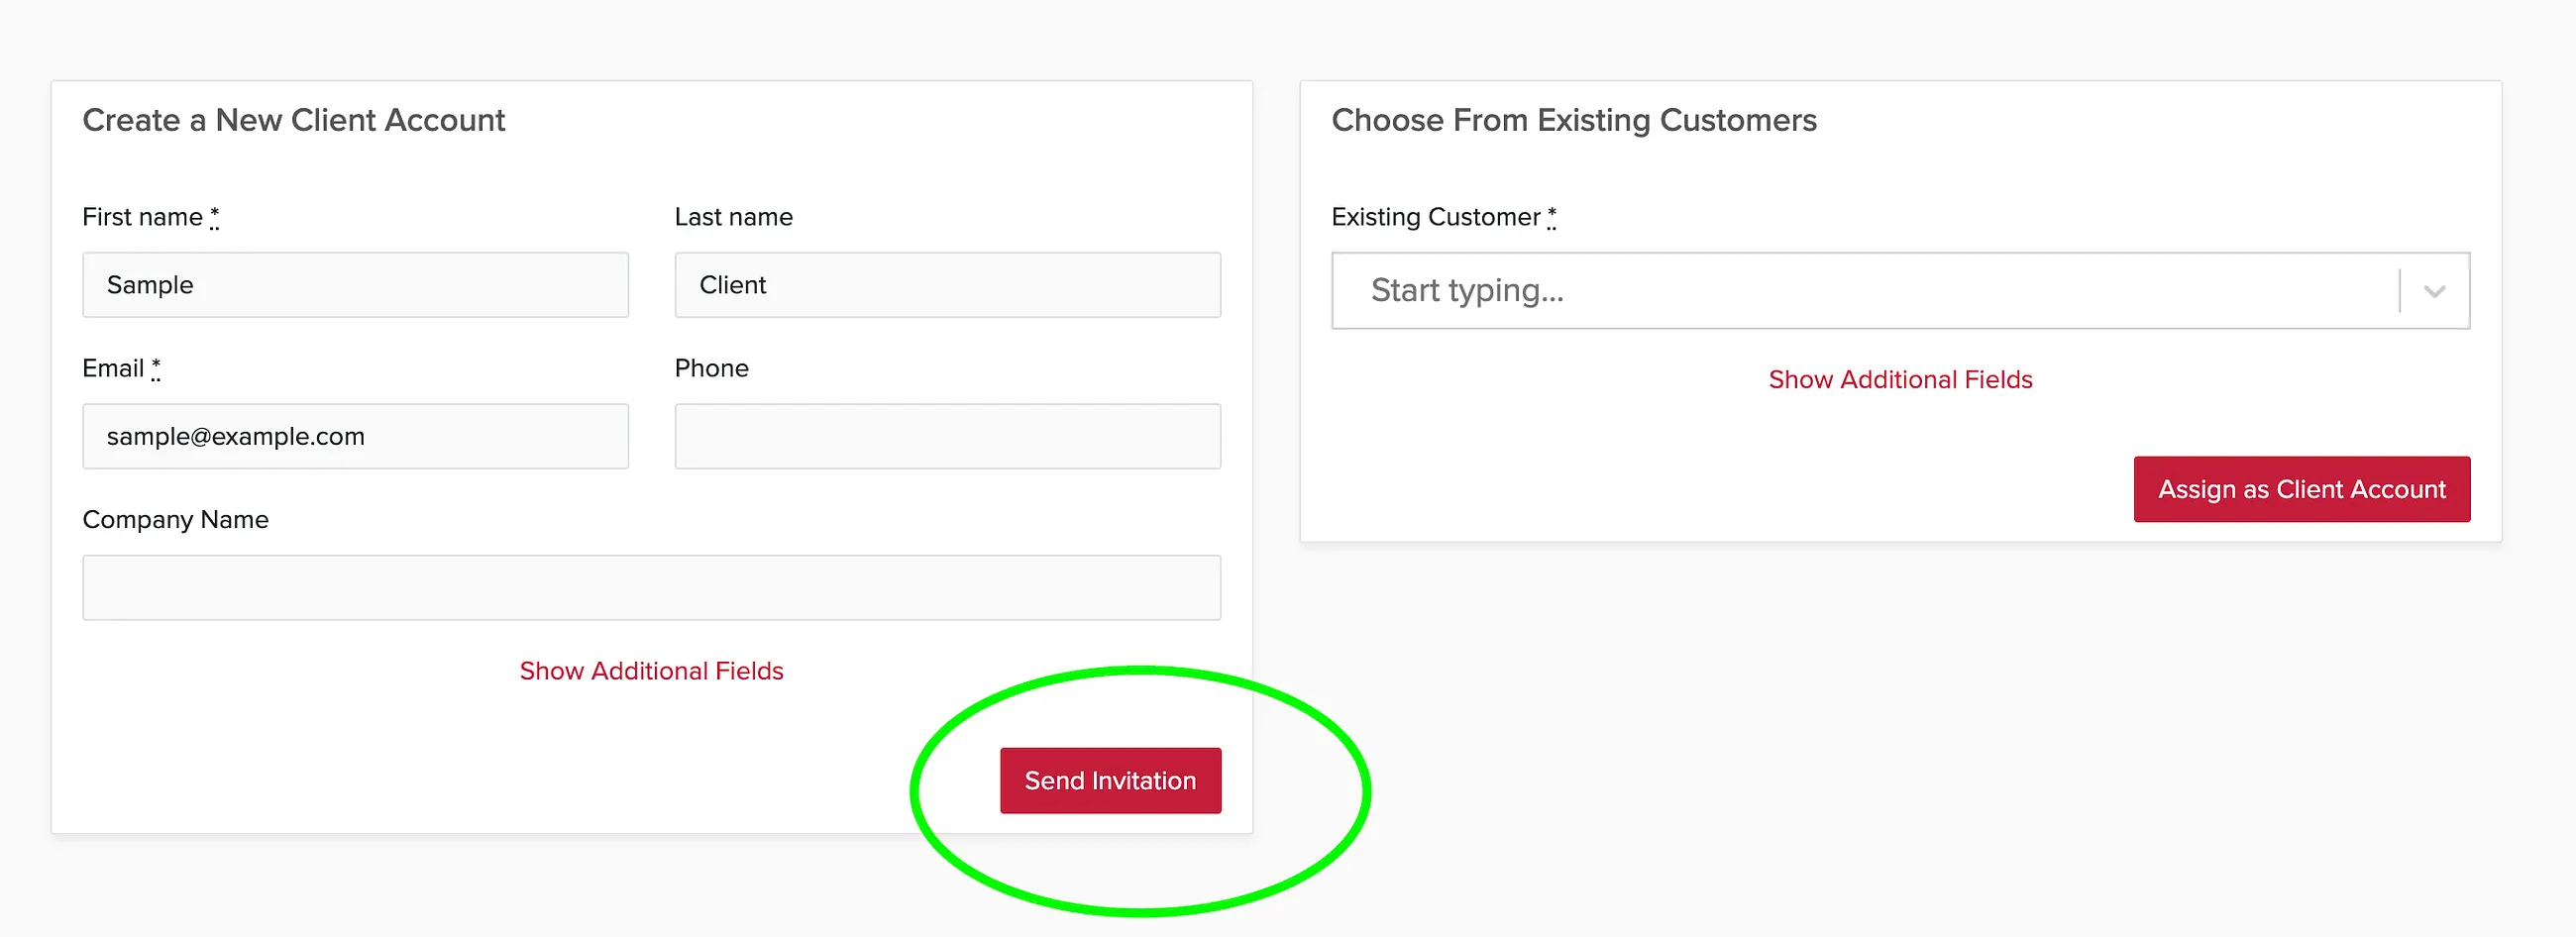
When you assign a new client to your booking, they'll automatically receive an invitation after you assign them to the booking:
When manually converting a proposal to a booking
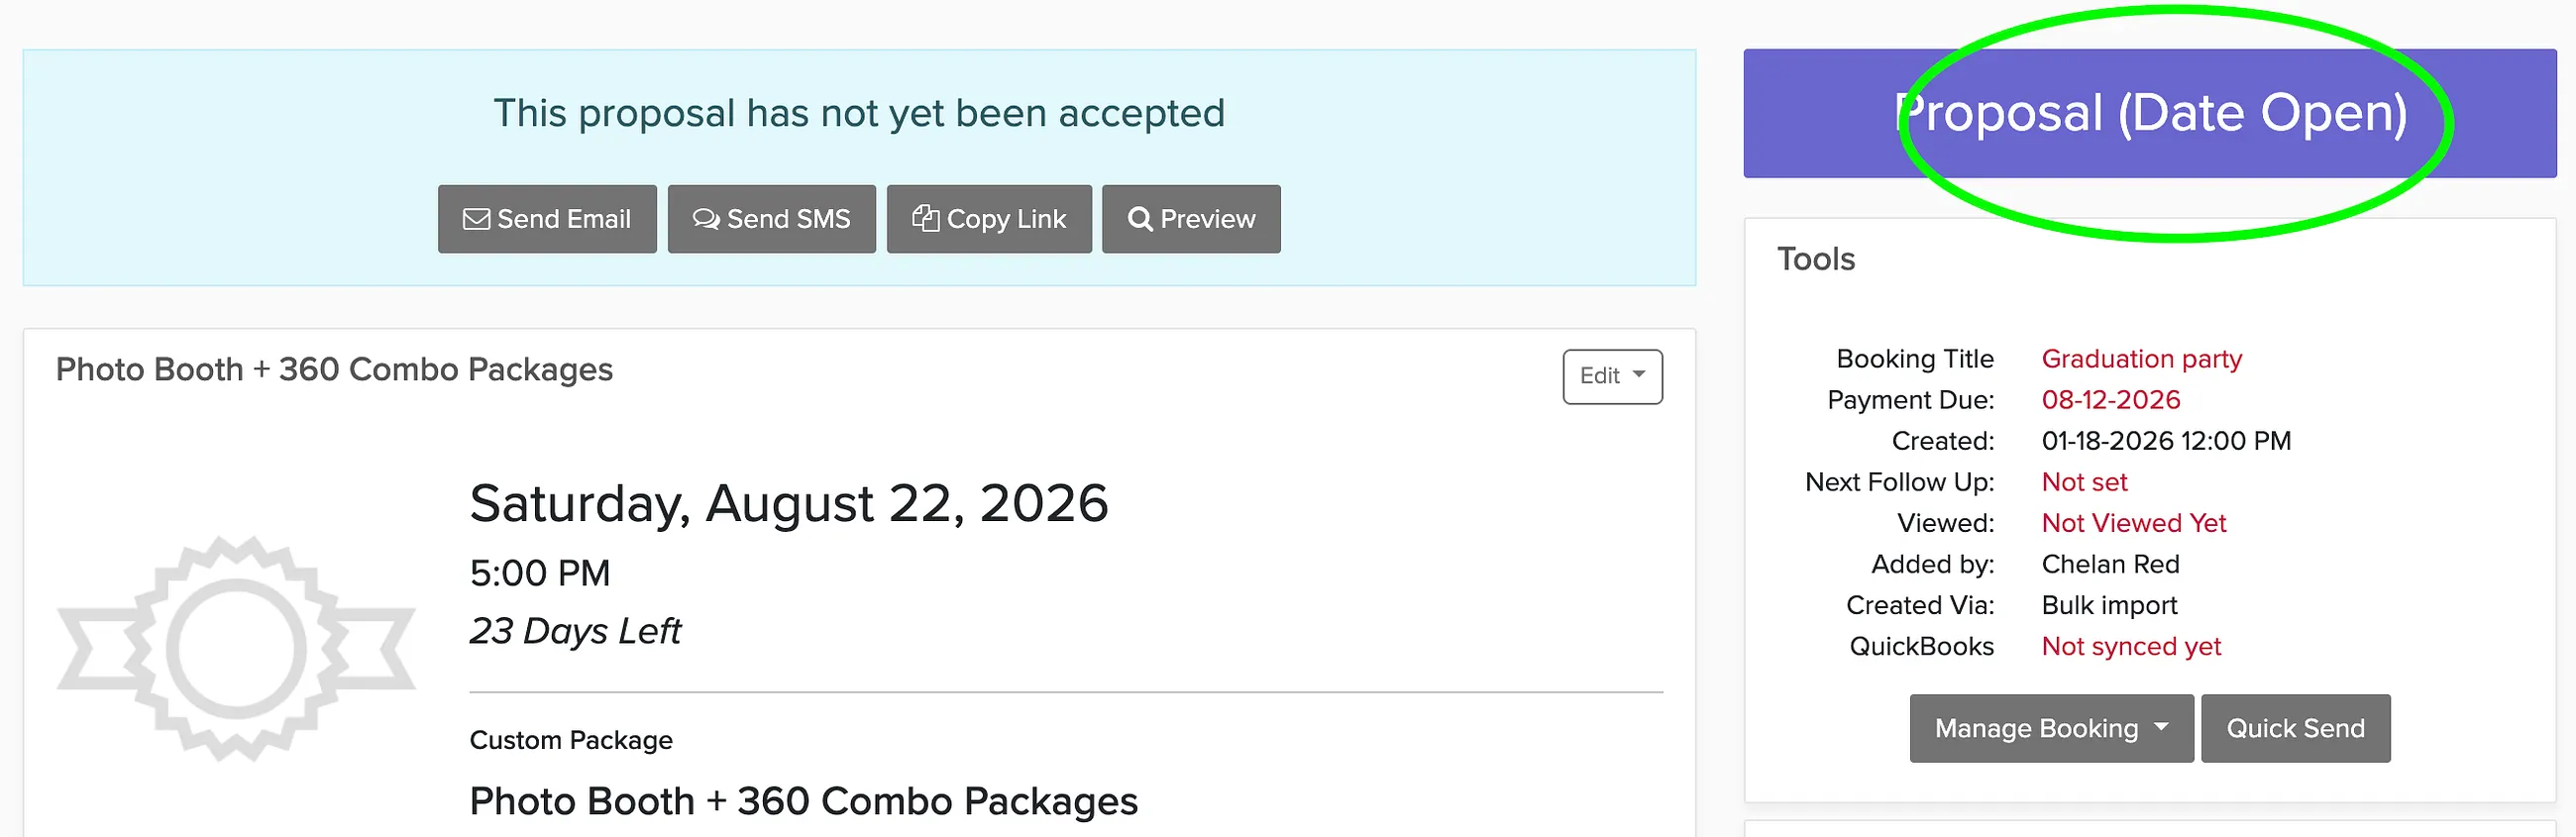
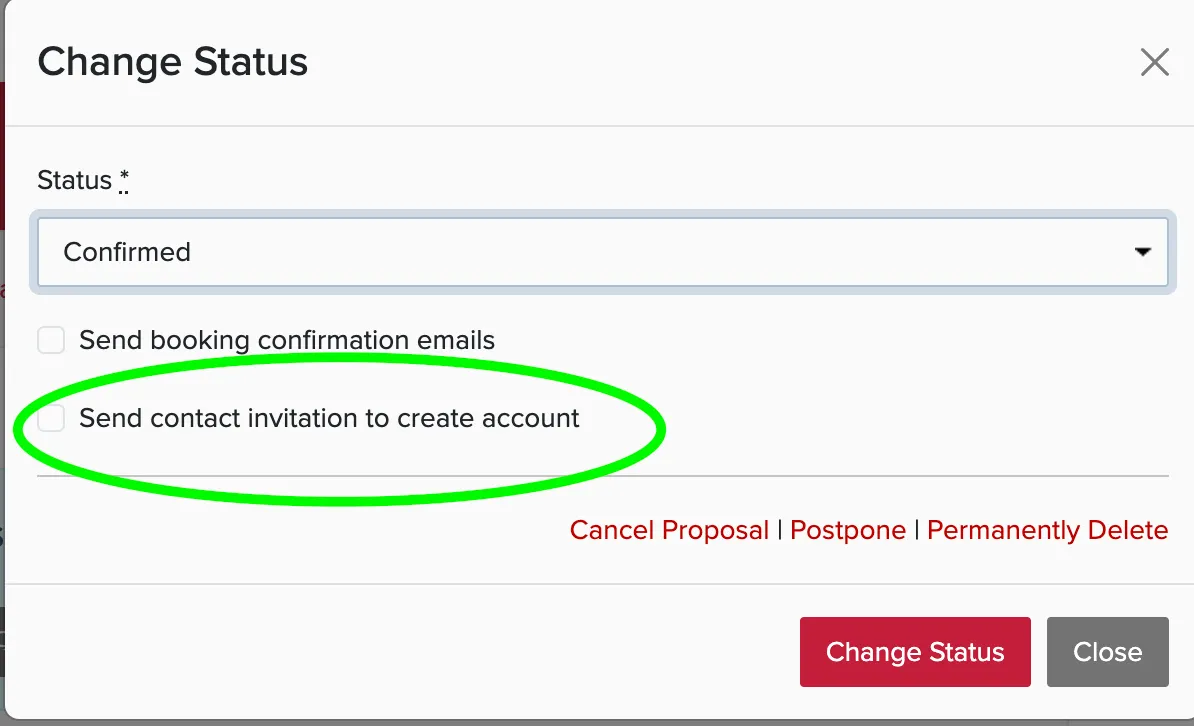
If you manually convert a proposal to a booking, check the "Send contact invitation to create account" in order to send them an invitation:
Re-sending an invitation
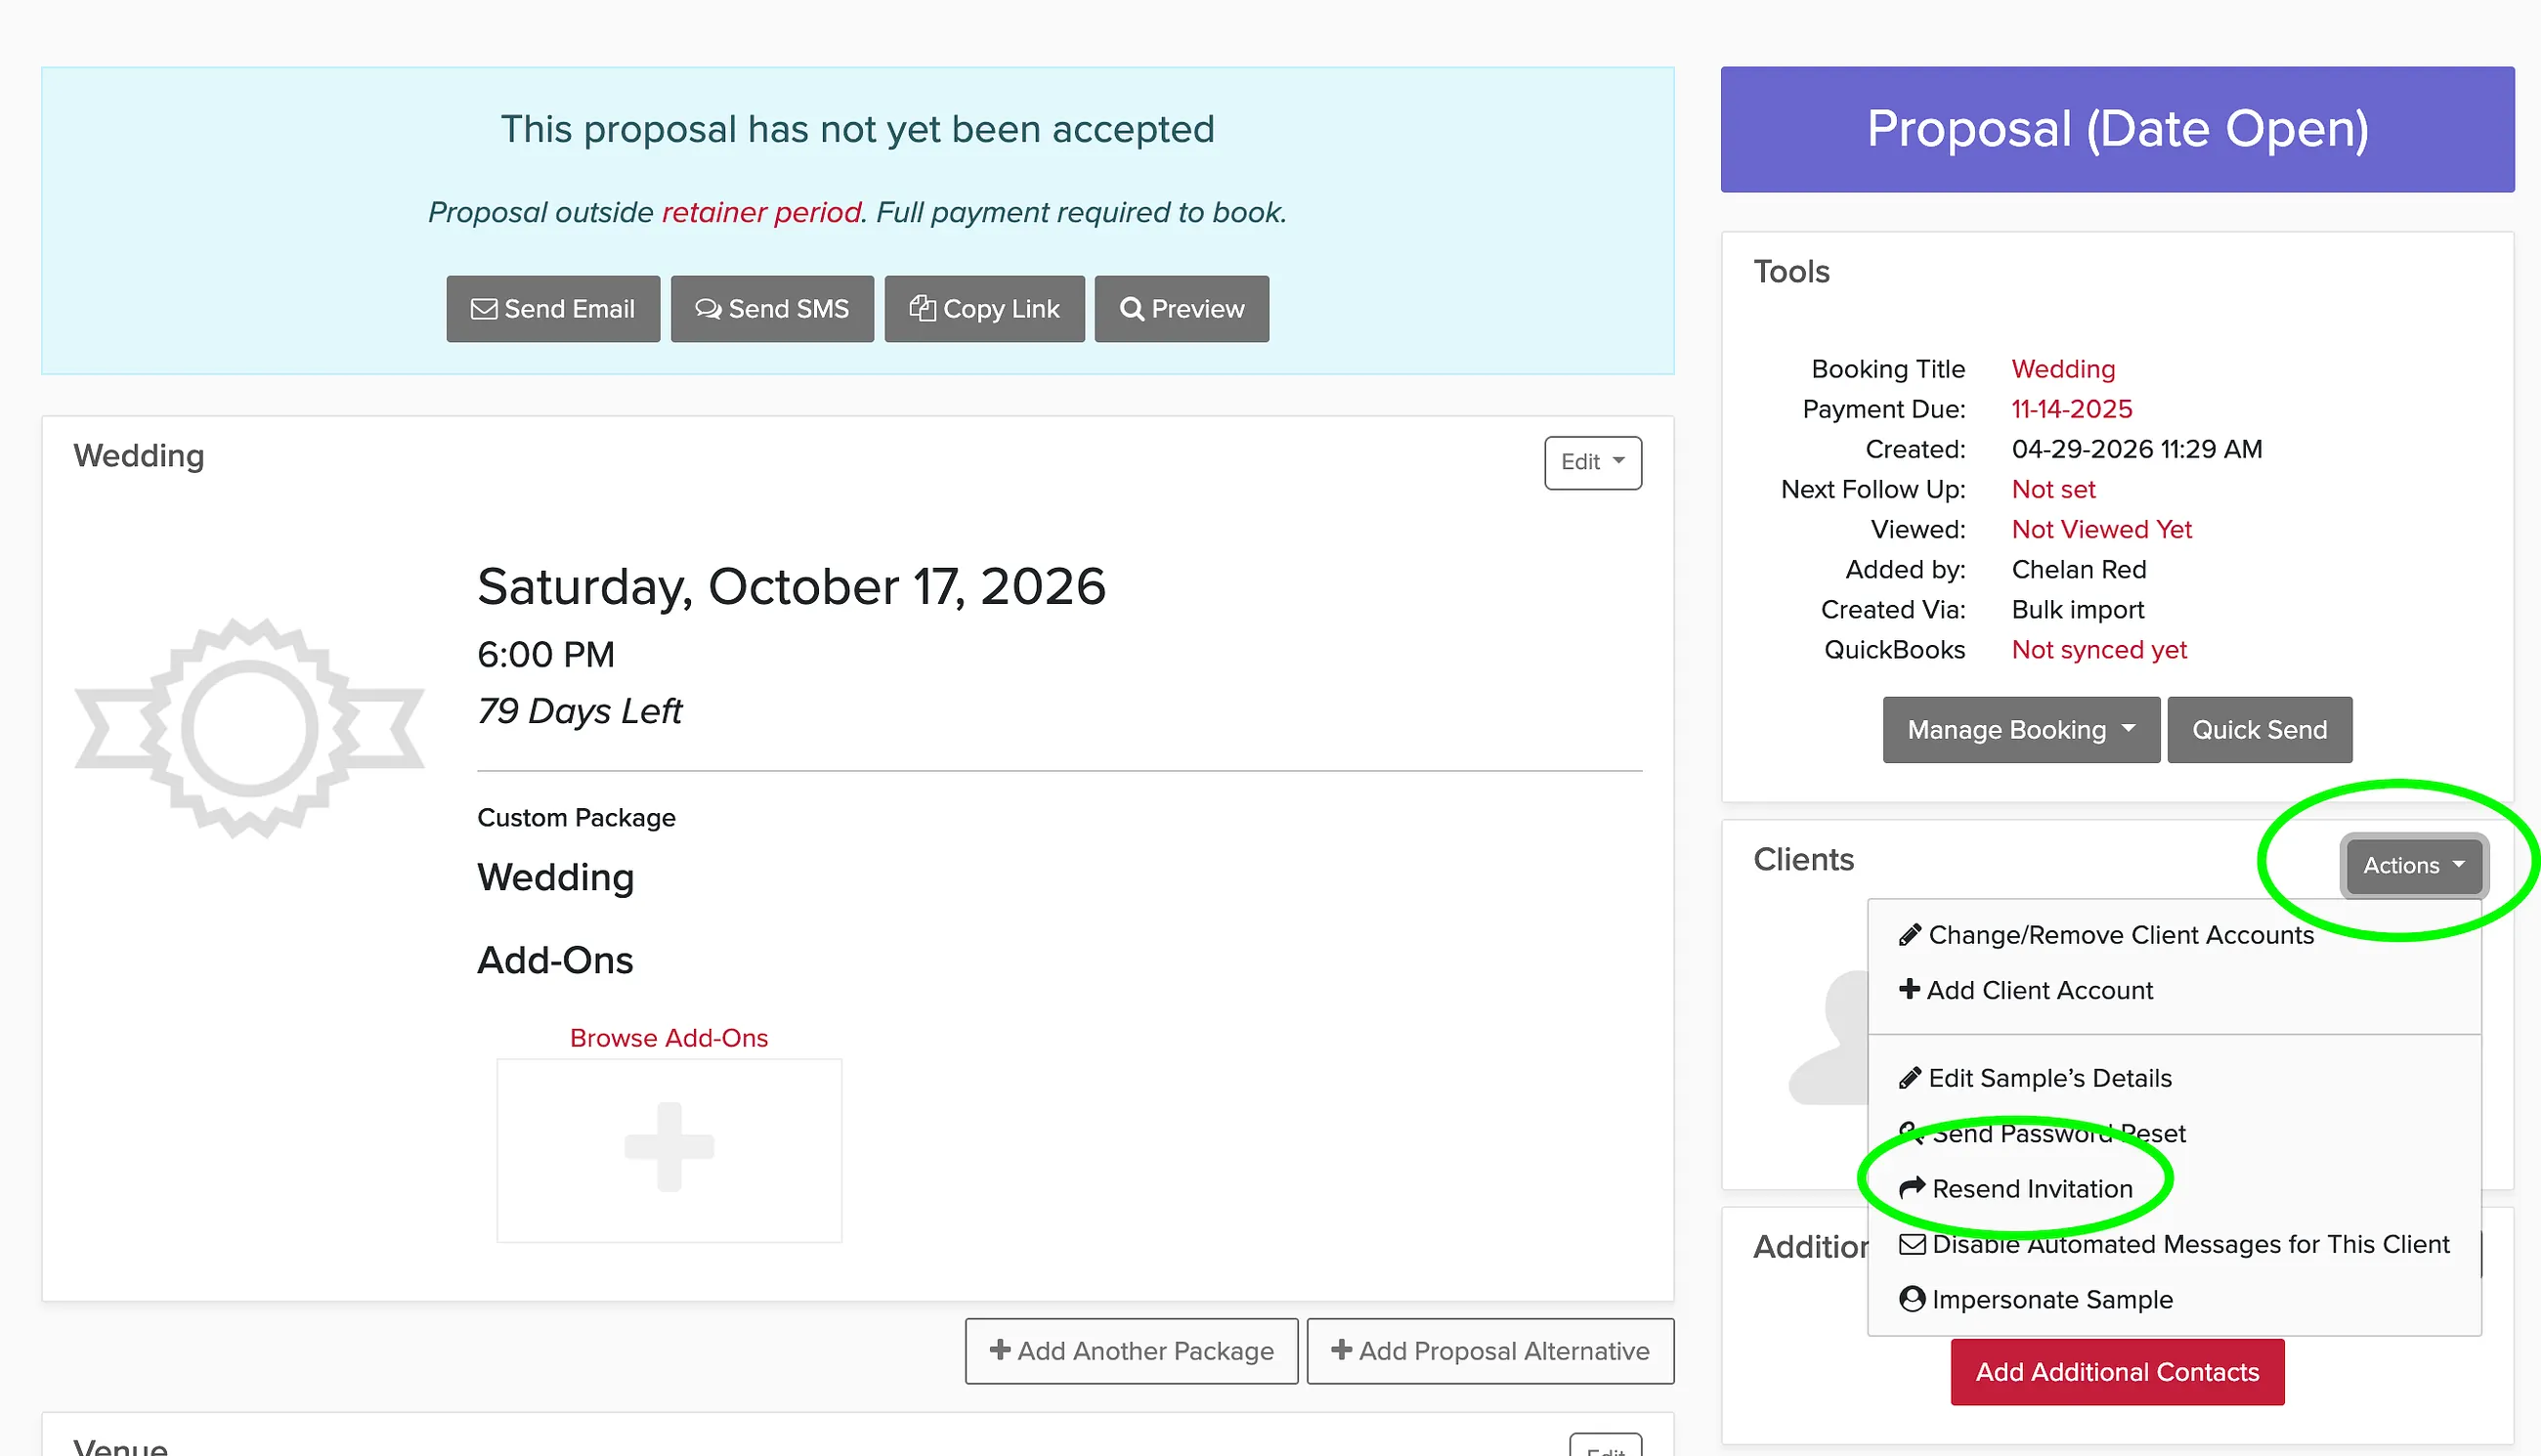
If the customer did not get their invitation or has forgotten their password, you can send re-send the invitation here:
User Accounts
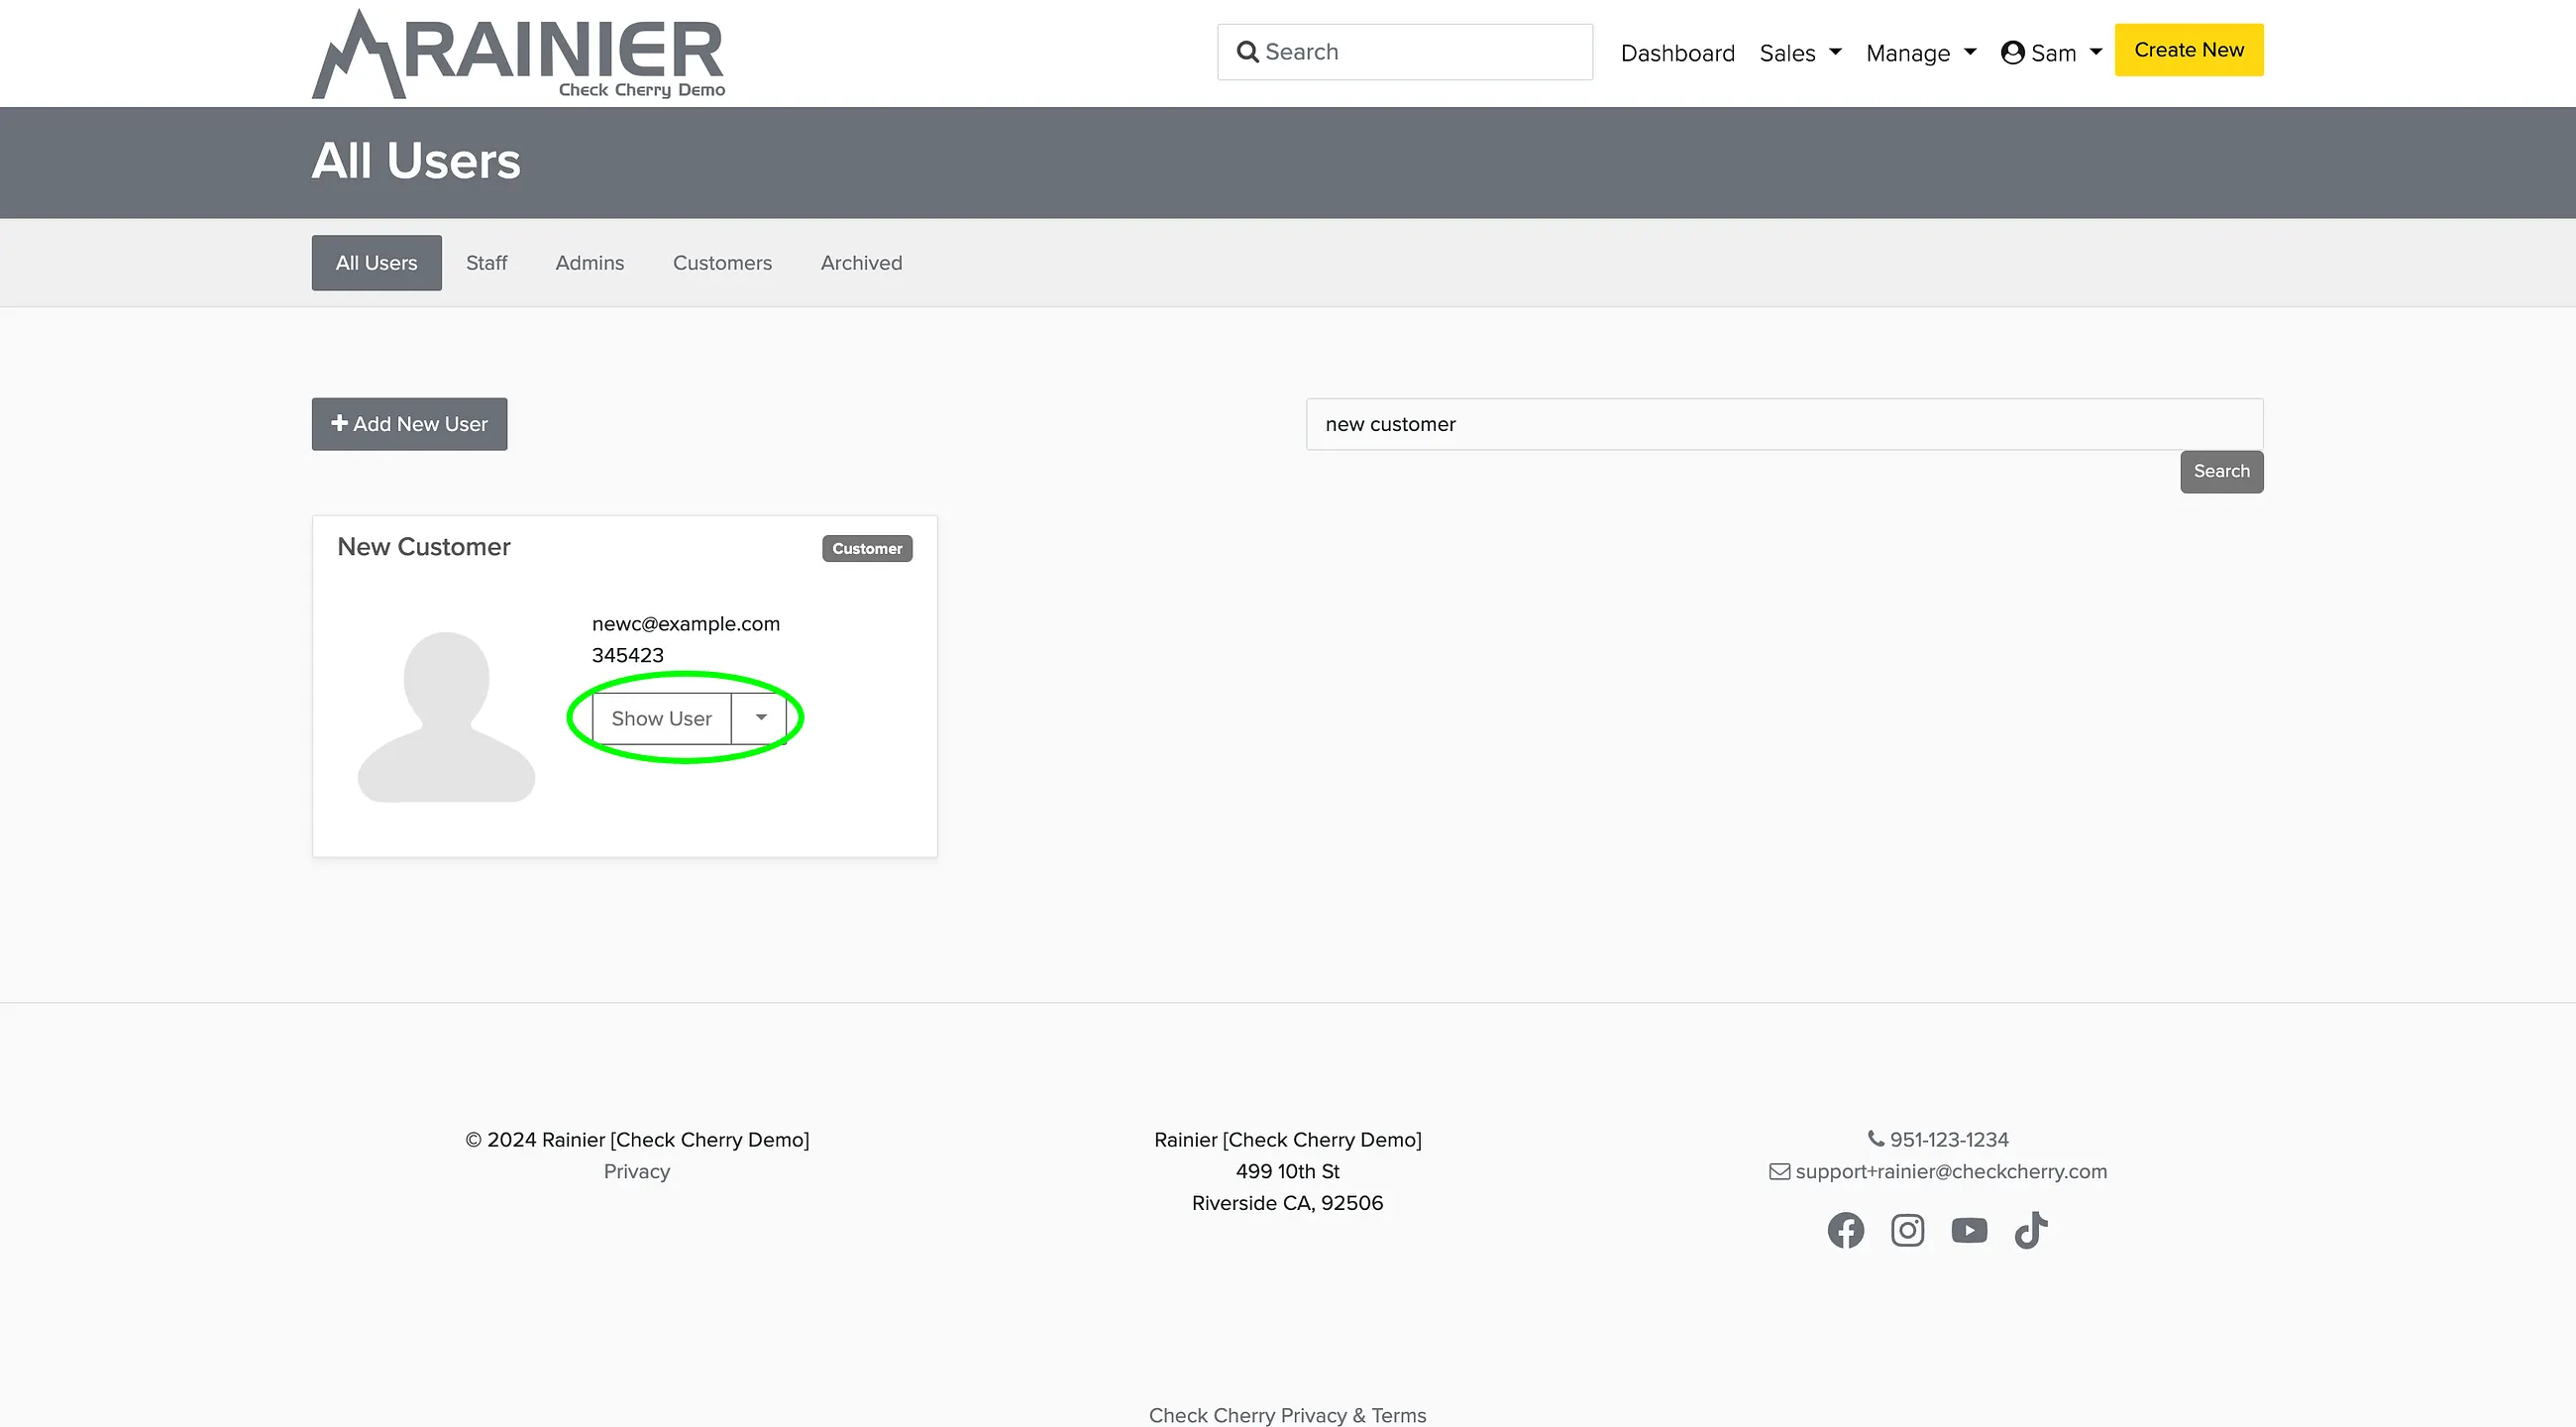
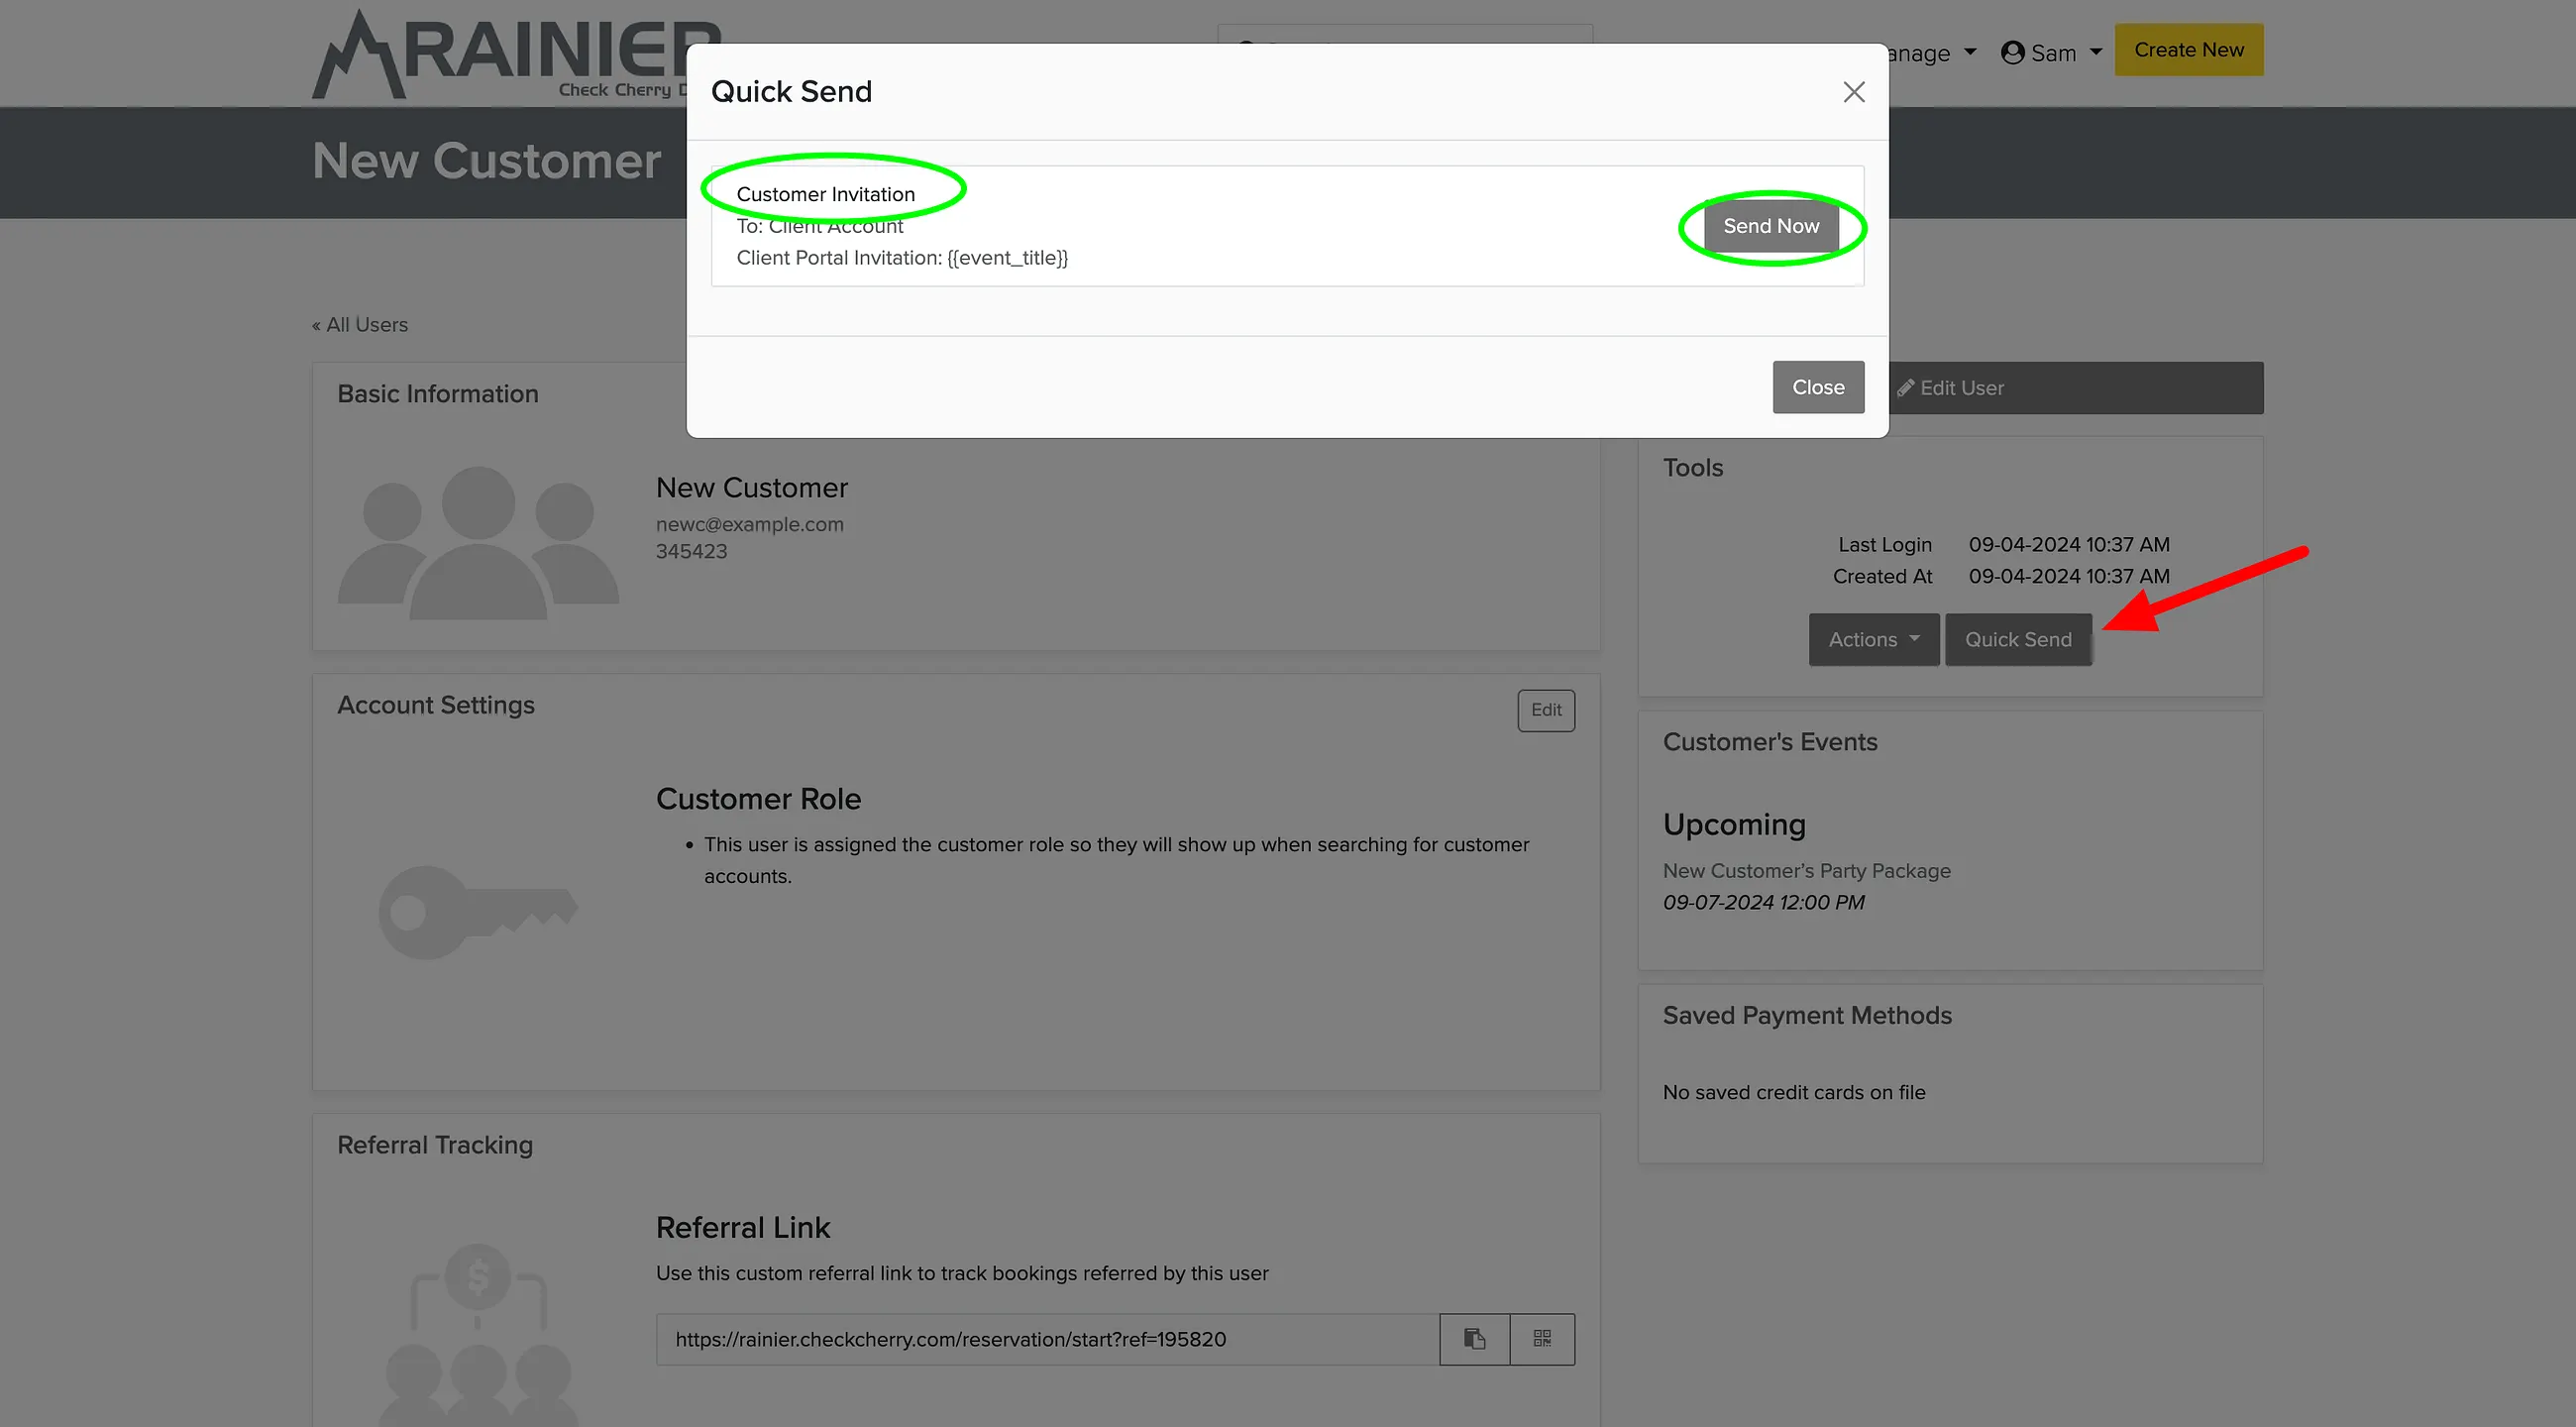
You can also send an invitation to clients or staff from the user account center.
The invitation link
The email carries a one-time link. The client clicks it, chooses their own password, and lands on their most recent upcoming booking, or the dashboard if they do not have one. See what clients can do in their portal for where they go from there.
Because the link works once, it dies the moment they set a password. A forwarded email will not let a second person into the account, so anyone else who needs access needs their own invitation. Sending a fresh invitation does not break the one you sent earlier, so there is no risk in resending when a client says they cannot find the email.
Invitations vs password resets
An invitation is for setting up an account the first time. If a client has logged in before and simply cannot get back in, a password reset is the right tool. From the booking, use Send Password Reset in the same Actions menu on the Clients panel. Clients can also reset themselves from the forgot password link on your login page, which is usually the fastest thing to tell someone who has you on the phone.
Customizing the invitation email
The invitation is a system template, so you rewrite it once and every invitation after that uses your version. Worth editing if you want the client pointed at something specific once they are in, like signing the contract or starting the planning form.
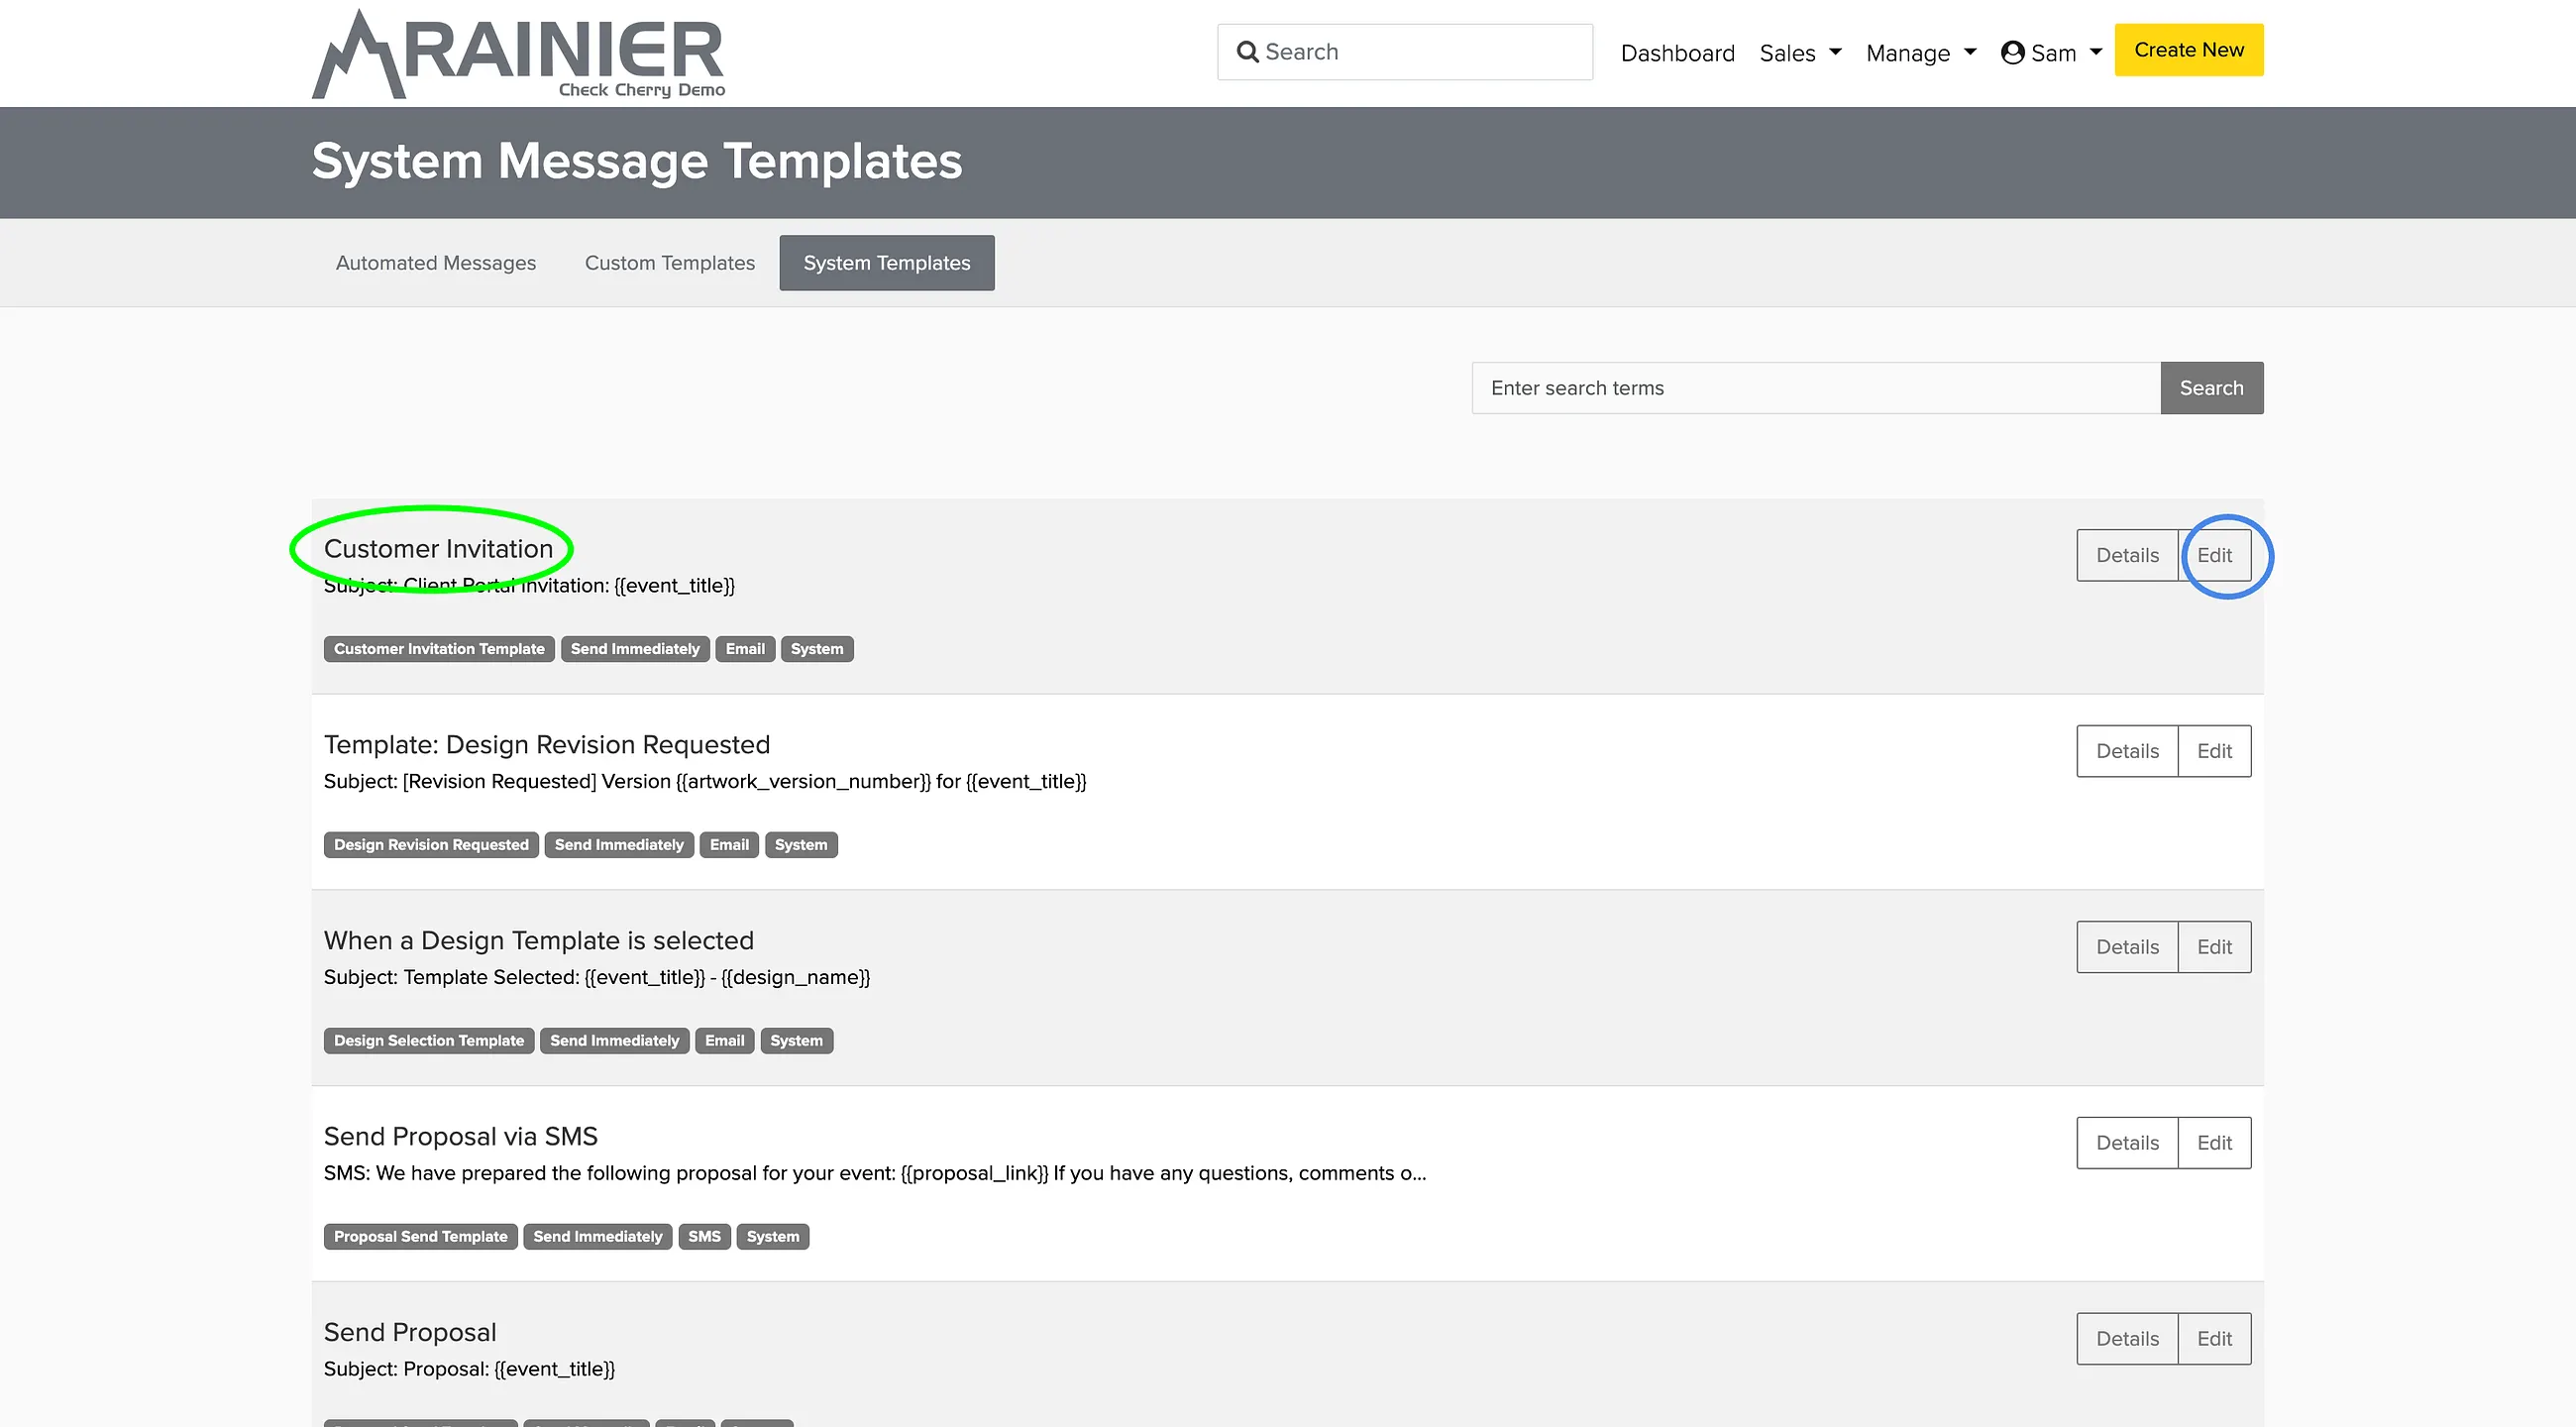
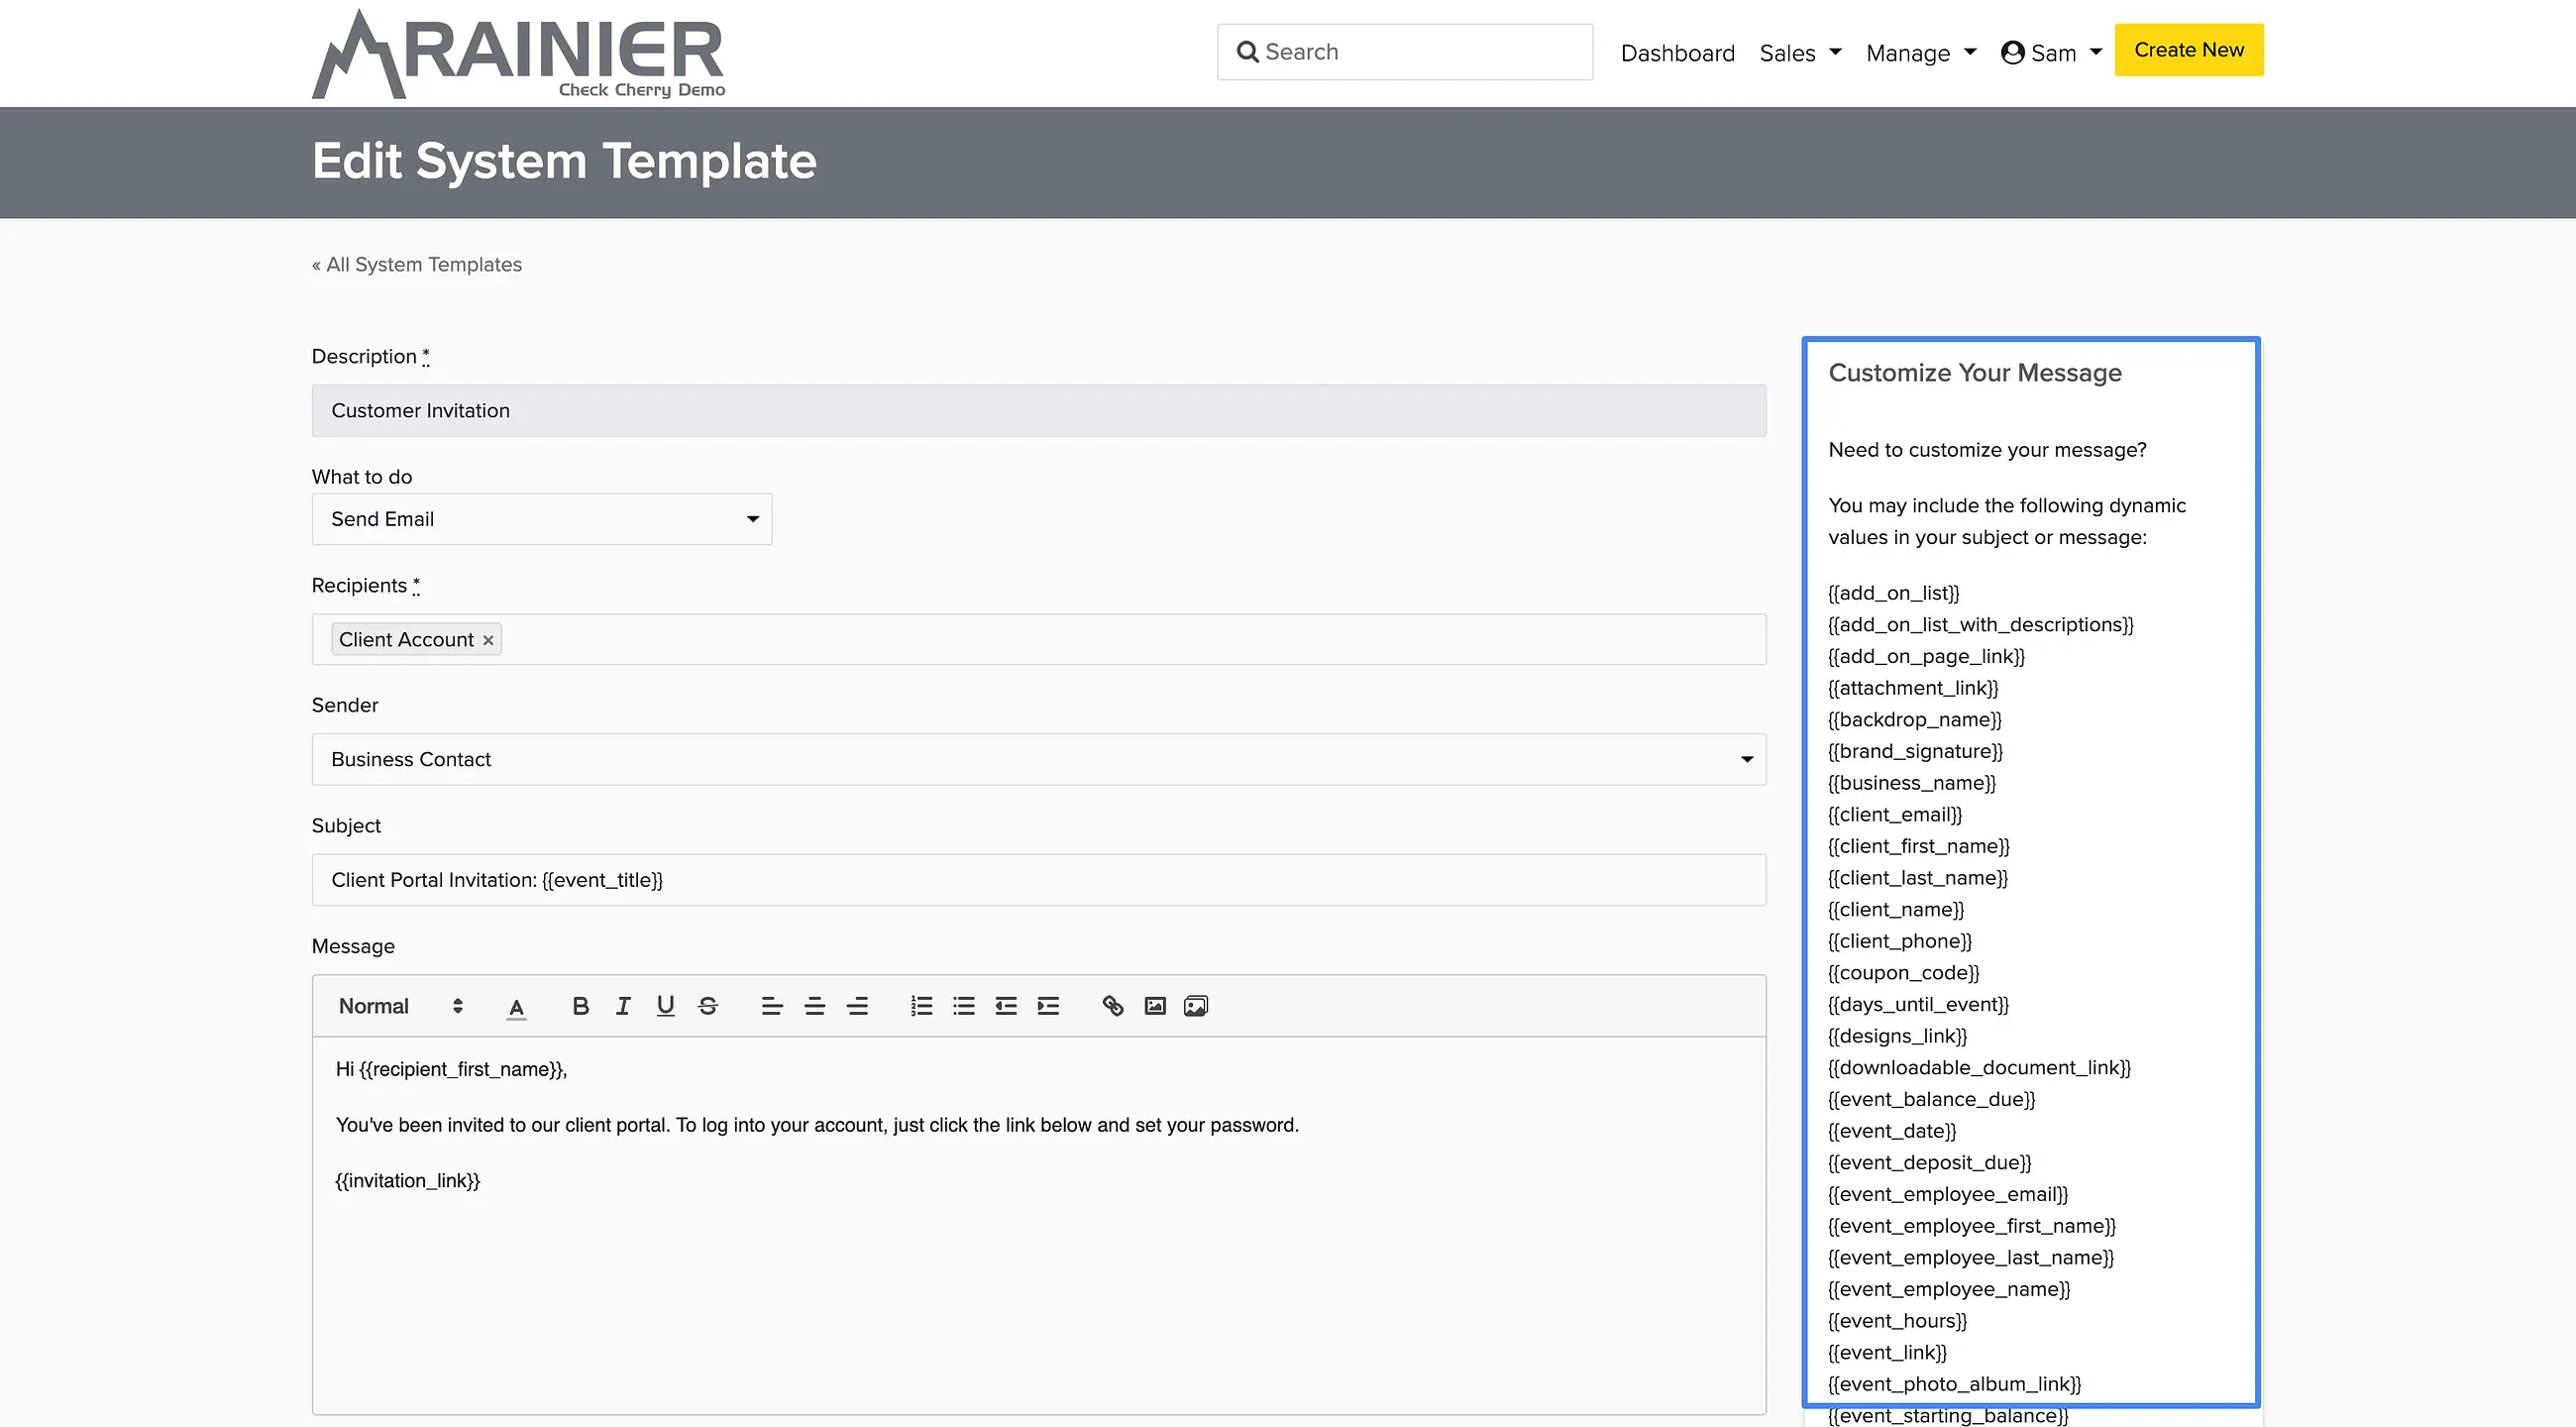
Leave {{invitation_link}} somewhere in the message. That is the link the client clicks to set a password, and the template will not save without it. The sidebar lists the other merge fields you can drop in, like the client's first name and the booking title.
Inviting someone on your team works a little differently, and only admins can do it. See how do I invite a staff member to log in.